

A chimney includes many parts that allow it to work as expected. If one part is damaged or destroyed, it can lead to a domino effect of problems for your home’s indoor air quality. One of these chimney parts is known as a chimney crown and is prone to needing repairs. For this reason, you will learn how to repair a chimney crown.
What Is A Chimney Crown?
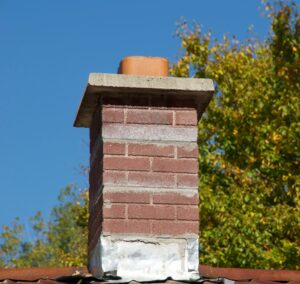
Before getting into how to repair a chimney crown, you need to understand what a chimney crown is and what it does. The chimney crown is located at the top of the chimney structure. They protect the chimney from extreme weather conditions, meaning that they bear the brunt of any weather damage.
How Are Chimney Crowns Damaged?
The weather damage against which chimney crowns protect chimneys is the primary culprit behind how they get damaged. However, there is one specific type of weather damage to which chimney crowns are often susceptible: freeze-thaw damage. This kind of damage occurs when any water around this part of the chimney freezes and thaws as a result of below-freezing temperatures, causing the chimney crown to crack.
How To Repair A Chimney Crown
Now that you know what a chimney crown is and how it can be damaged, it’s time to look at the step-by-step process of how to repair a chimney crown.
1. Find The Best Sealant
The first step in learning how to repair a chimney crown is to find the best sealant material for it. When a chimney crown is cracked, the cracks need to be resealed. In order to prevent future damage, you’ll need to find a sealant that will effectively protect the chimney crown against extreme weather conditions. The most highly recommended sealant is an elastomeric coating known for its flexibility.
2. Hire A Professional
As tempting as the idea of saving money is by making a chimney repair a DIY project, you really need to hire a professional to get the job done. It will be far less expensive to pay someone who knows how to repair a chimney crown like the back of their hand than risking your well-being by doing the job yourself. Even if a professional is doing the job, you should still know what exactly they will do once they begin repairing the chimney crown.
3. Duct Tape The Chimney Flue
After climbing up a ladder to safely reach the chimney, the chimney flue will be covered in duct tape. Duct-taping the chimney flue will keep the coating in place and prevent it from seeping into other parts of your chimney. The duct tape is often applied an inch below the base and an inch above the chimney crown.
4. Brush the Crown
Once the chimney flue has been duct taped, the professional you’ve hired will use a wire brush to get any dirt and debris out of the cracks. Leaving any debris inside the cracks will lead to more problems with your chimney, so brushing must be thorough.
5. Fill The Cracks
Once the debris is brushed out, filling the cracks will be the next step in how to repair a chimney crown. The small cracks will likely be filled using silicone or acrylic caulk, while larger cracks will be filled with a concrete-like substance. A paintbrush will be used to smooth over the fillings and left to rest for about fifteen minutes before continuing with the final step.
6. Apply Two Coats Of Sealant
Finally, a sealant will be applied to the chimney crown so it can remain protected against severe weather in the future. The first coat will need to rest for several minutes before the second coat is applied. Make sure the coating is gently and evenly spread with a paintbrush. After this last coat is dry, the duct tape will finally be removed.
Air Duct Cleaning Experts Will Repair Your Chimney!
Knowing how to repair a chimney crown will hopefully prepare you for what to expect when a professional comes to repair your chimney. Of course, the chimney crown is just one component that requires repairs to get your chimney back in working condition. The good news is you can contact us at Air Duct Cleaning Experts for Houston’s best chimney repair service!